

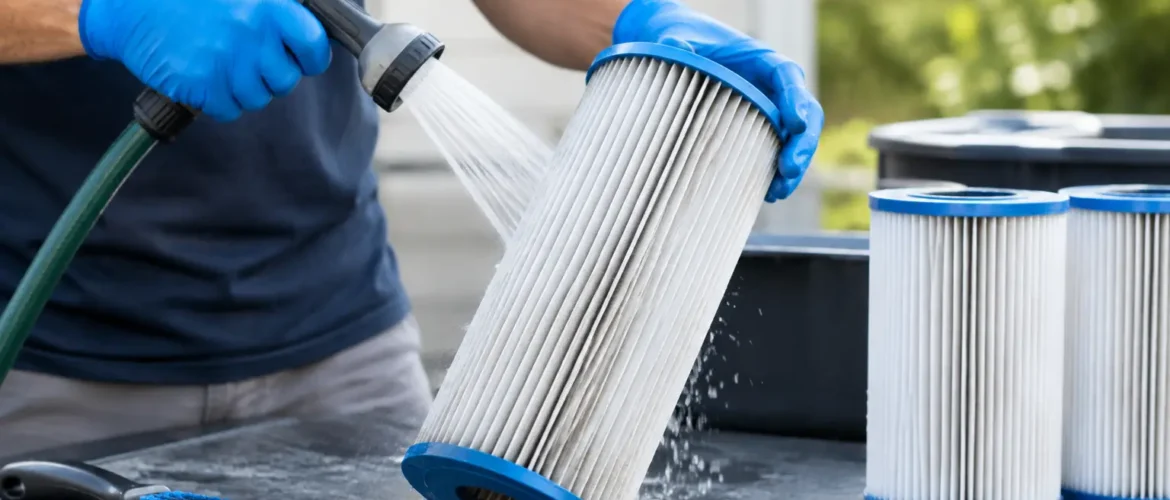
A cartridge filter can look clean from the outside while still holding enough sunscreen, body oils, pollen, and fine debris to restrict water flow. Knowing how to clean cartridge filters correctly helps protect your pump, maintain better circulation, and keep a Connecticut pool clearer through a busy swim season. The key is not cleaning them as aggressively as possible. It is removing buildup without damaging the fine filter media that does the actual work.
Know When Your Cartridge Filter Needs Cleaning
The pressure gauge is your best guide. After installing a clean cartridge and running the system normally, note the starting pressure. This is often called the clean pressure. When the gauge rises about 8 to 10 PSI above that baseline, it is time to clean the cartridge.
Do not rely on the gauge alone. Weak return flow, debris that lingers in the pool, cloudy water, or a pump that seems louder than usual can also point to a restricted filter. A clogged cartridge forces the pump to work harder, which can increase wear on equipment and reduce circulation when your water needs it most.
Some homeowners clean cartridges on a calendar schedule, but frequency depends on pool use, landscaping, weather, and water chemistry. A pool near trees may need more frequent attention in spring and fall. A heavily used pool may load up quickly with oils and fine debris even when the water looks fairly clear.
How to Clean Cartridge Filters Step by Step
Before opening any equipment, shut off the pump at the breaker or timer. Never remove a filter tank clamp while the system is running or under pressure. Open the air-relief valve on top of the filter and confirm that pressure has dropped to zero before loosening the tank.
Keep the filter tank area clean as you work. Dirt, mulch, and grass that fall into the open tank can travel right back into the plumbing once the system restarts.
Remove and Inspect the Cartridge
Open the filter housing according to the equipment manufacturer’s instructions, then carefully lift out the cartridge. Most cartridges have pleated filter material wrapped around an internal core. Hold it by the end caps rather than squeezing the pleats.
Look closely at the bands, end caps, and pleats. A few small stains are normal, but torn fabric, separated end caps, crushed pleats, or a collapsed core are signs the cartridge should be replaced. Cleaning cannot restore damaged filter media.
Also inspect the tank O-ring. If it is dry, flattened, cracked, or stretched, it may not seal properly. Clean the O-ring groove and use only an appropriate pool-safe lubricant if needed. Petroleum jelly is not the right choice for most pool O-rings because it can cause rubber to deteriorate.
Rinse From Top to Bottom
Use a garden hose with a standard spray nozzle to rinse the cartridge. Start at the top and work downward, angling the spray between the pleats to flush debris out rather than packing it farther in. Rotate the cartridge as you go so each section receives attention.
Use moderate water pressure. A pressure washer may seem efficient, but it can flatten, split, or weaken the pleated material. Once the pleats are damaged, the filter can allow more debris through or become difficult to clean properly.
For routine cleaning, a thorough hose rinse is often enough. Let the cartridge dry briefly if you need a better view of remaining debris, then rinse it again. Drying can help loosen fine material trapped in the pleats, but do not leave a wet, dirty cartridge sitting for days where oils and organic matter can harden.
Soak Away Oils and Stubborn Buildup
If the cartridge still looks gray, feels slick, or has poor flow after a normal rinse, it likely needs a deeper cleaning. Sunscreen, lotions, oils, and some water-treatment products can coat the media and prevent water from passing through freely.
Use a cartridge-filter cleaner or a product specifically labeled for pool filter degreasing. Follow the product directions for dilution and soak time. Fully submerge the cartridge in a clean plastic container, then rinse it thoroughly afterward. Residue left in the cartridge can foam or affect water balance when the system starts back up.
Avoid household cleaners, bleach, and dish soap. These products can leave residues, damage filter media, or create water-quality problems. They may seem like convenient substitutes, but pool equipment is not the place to experiment with cleaners that were not designed for the job.
Acid washing is another area where homeowners should be cautious. Acid may remove mineral scale, but it can also shorten cartridge life, especially if used repeatedly or before oils have been removed. Acid should only be considered when visible calcium scale remains after proper degreasing and rinsing. If you are unsure whether the issue is scale, staining, or normal discoloration, professional guidance can prevent an expensive mistake.
Reassemble the Filter Carefully
Once the cartridge is clean and rinsed, place it back in the tank exactly as it was installed. Make sure it seats correctly on the internal manifold or standpipe. A cartridge that is crooked or not fully seated can allow debris to bypass the filter.
Reinstall the lid and clamp as directed by the manufacturer. Open the air-relief valve, start the pump, and allow air to escape until a steady stream of water appears. Then close the valve and check the tank for leaks. Record the new clean pressure so you have an accurate baseline for the next cleaning.
What Not to Do When Cleaning Pool Cartridges
The most common mistake is using too much force. High-pressure washing, stiff wire brushes, and aggressive scraping can damage pleats that cannot be repaired. Another mistake is cleaning a cartridge every few days simply because there is visible debris on it. Overcleaning shortens the usable life of the filter and is usually unnecessary if the pressure has not risen significantly.
Do not run the pool system with the cartridge removed, even briefly. The filter housing and plumbing are designed to operate with the internal cartridge in place. Running without it can send debris into places where it is harder to remove and can create equipment issues.
It is also wise to avoid waiting until circulation is severely restricted. A cartridge that has been left clogged for too long can become difficult to restore. Regular pressure checks are easier on both the cartridge and the pump.
When Cleaning Is Not Enough
A well-maintained cartridge filter can often last one to three years, though actual life varies by pool size, bather load, water chemistry, and cleaning habits. Replacement is the better choice when the pleats stay flattened, the material tears, the end caps crack, or pressure climbs again soon after cleaning.
If your filter is repeatedly getting dirty far sooner than expected, the cartridge may not be the real problem. Persistent algae, poor water balance, inadequate pump run time, a failing pressure gauge, or undersized equipment can all contribute to recurring filtration trouble. Replacing cartridges without addressing the underlying issue can become an expensive cycle.
For homeowners with a fiberglass pool, smooth gelcoat surfaces generally make routine debris removal easier, but the filter still handles what the skimmer misses: fine dust, pollen, body oils, and microscopic contaminants. Good circulation, balanced water, and a clean cartridge work together. One cannot fully compensate for another.
A Practical Connecticut Pool-Care Routine
During the active season, check filter pressure at least once a week and after heavy storms, large gatherings, or major pollen events. Keep the pool water at the proper level, empty skimmer and pump baskets regularly, and brush debris toward the skimmer before it settles.
Before closing season, clean the cartridge thoroughly so it is not stored with oils or debris embedded in the pleats. If you have questions about a cartridge that will not recover, recurring high pressure, or weak circulation, EZ Aqua Fiberglass Pools can help identify whether the answer is cleaning, replacement, or a broader equipment repair.
A clean cartridge should improve flow, not become another weekend project. Pay attention to pressure changes, use a gentle cleaning method, and replace the filter when its material has reached the end of its service life. Your pump and your pool water will both show the difference.